This is such an adorable and easy craft. It is so handy and we just love ours. You can use them around a fire pit, for a cookout, camping or by the pool. I can’t wait to use mine and to hear what people have to say about them.
Difficulty: 2 (out of 5)
What you’ll Need:
- tin can
- scrap fabric
- 1/4″ rod
- (2) 1/4″ bolt
- (2) 1/4″ washer
- scissors
- hot glue gun
- drill with 1/4 inch bit or a hammer, nail, and screwdriver
- rust proofing clear coat (optional)
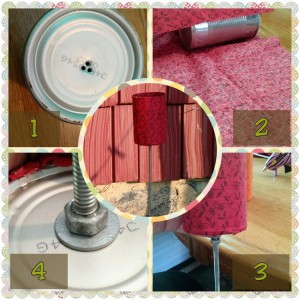
Start with an empty, washed and dried can with no top. (If you still have the label keep it, it will come in handy on the next step) On the bottom drill a hole unless your like me and go for the drill only to discover that it has a dead battery. Being the impatient person that I am I started thinking of other ways to do this step. So I grabbed a hammer and nail. I made three holes in the shape of a triangle.
So then I took a screwdriver about 1/4 inch thick. Put the tip of the screwdriver in the middle of the triangle you made with the nails and hammer it through. I also added a couple more holes in the bottom of the can so that water could drain out in case it rained. (Big thanks goes out to my mom for this suggestion!)
The scrap fabric I used for this next step I bought at Wal-Mart for 97 cents. (woohoo) It was more then enough fabric and I could have done two cans with it and still had fabric left over.
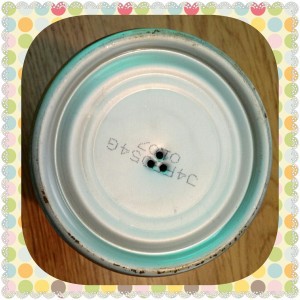
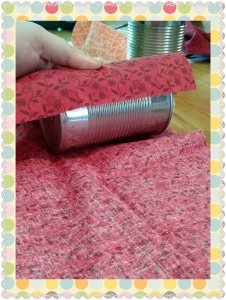
If you still have the label you can use that as a pattern by laying it on the fabric and marking the size. Leave 1-2″ of fabric at the top to wrap over the top of the can to cover the sharp edge inside of the can. If you don’t have a label just lay the can on the fabric and mark where the bottom is (leaving the same 1-2″ inch of fabric at the top) and roll the can to find the length you will need, add a inch or two to the length to make the fabric more secure.
Use the hot glue gun to attach the fabric to the can. This is when I found out just how fast hot glue dries on a can and even worse how fast it can burn your fingertips making it very hard to do anything else for awhile. After several attempts I found that if you start at the bottom of the can and go half way up, glue down the fabric and then do the second half you will have enough time to really make it stick. When you are wrapping the fabric around the can pull it tight and then glue the other end of the fabric down in the same fashion as before.
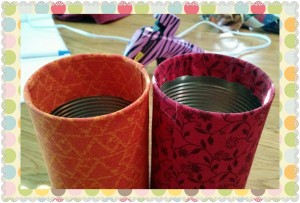
Now you can push the extra fabric that you left at the top into the can and glue it down. If you have any overhang on the bottom of the can you can cut it off or glue it down as well.
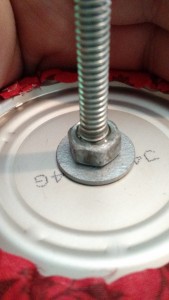
I bought all of the hardware I needed for this project from Lowes for $8.14. The rods I chose were 3 ft. long but you can get whatever length you want. The first thing I did was glue one of the washers to the bottom of the can over the hole with quick drying super glue while that dried I took one of the bolts and put it on the rod far enough down so that the top of the rod will stick out of the top of the can.
I did it this way so that it was easier to attach the bolt to the rod without jamming my hand into the can. It only takes a couple seconds for the glue to set and then you can put your rod through the hole. Put the other washer over the rod so that it slides down and then put the bolt on the top of the rod so that it is flush. Turn the rod upside down so that the can falls forward onto the bolt at the top of the rod and tighten the bottom bolt till the can is secure. I took a pair of pliers and tightened both bolts and then I put superglue into the center of both bolts so that they would hold tight to the rod.
Last thing I did was to spray the entire thing with a rust proof clear coat so that it was protected against the elements. I had it suggested to me to fill the bottom of the can with resin or glue to make it flat on the bottom and all though I haven’t tried that yet I thought I’d pass it on to all of you for your benefit.
**After about a week of use and sitting in the rain the bottom bolt started to loosen on one of the cup holders so I brought them back in and added a blob of hot glue under the bolt for extra security.**
For more ideas like this visit craftfarmfun.com.
My name is Jess and I recently started my own blog at craftfarmfun.com. I blog about everything from my life, farming, recipes and of course crafts! Crafts have been a passion of mine for a long time and I have the paper cuts, hot glue gun burns and occasional scars to prove it. We recently started a farm and the stories of me being chased by chickens are just to0 much fun not to share. So stop on by for a read and a good laugh, leave a comment if you can. Have an awesome day!

Leave a Reply