While you are here, make sure to visit our Facebook Page and enter our $250 Home Depot Card Giveaway!!!
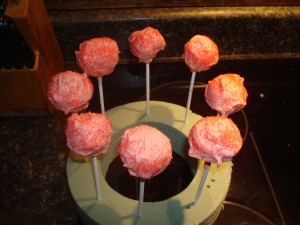
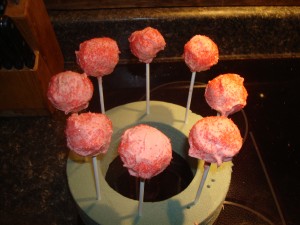
Today we are going to continue our discussion of Cake Pops! If you read last week, I REALLY wanted to try these, SO, here are my first batch! This is a basic post on how to make them! You can either follow the directions in the post, or watch the Training Videos on You Tube! If you have made cake pops, feel free to add any comments, tips, or insights!
Check out our Online Training Videos on how to make cake pops:
1. First Steps- Ingredients/Baking Video
Yesterday, we tackled the task of making our first set of cake pops. We have a baby shower coming up in a few weeks, and I really wanted to have tried these out beforehand. We learned a LOT from our first time making them!
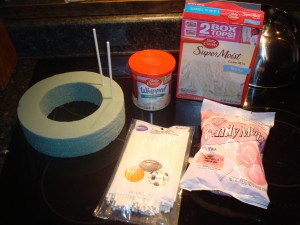
First, we started out with the following ingredients/supplies:
- Wilton Lolli-Pop sticks (Michael’s)
- Wilton Candy Melts (Michael’s)
- 1 box of Betty Crocker Cake Mix (any flavor)
- 1 box of Betty Crocker frosting (any flavor)
- Decorations (sprinkles, decorating sugar, etc.)
- Floral foam (I would recommend the ring for storing in fridge
- Floral foam block (for final display)
- Large mug to use as base for display
Steps:
1. First you bake the full-size cake. When it has cooled, destroy the cake by crumbling. This can be done with a fork, your hands, or a mixer.
2. Once the cake is crumbled into a nice texture, add 1/2-3/4 of the tub of frosting. Mix thoroughly to make your cake pops.
3. Once you have a smooth sticky texture, form them into cake balls (about the size of a quarter, or ping pong ball.
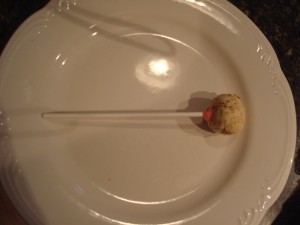
4. Melt a small amount of the chocolate or candy melts, and dip your Lollipop stick into the candy, and insert into the cake balls.
5. Place cake balls with sticks into the refrigerator, and allow to cool for about 2 hours. Before you are ready to dip them, I stick mine into the freezer for about 10-15 minutes.
6. Melt the rest of your chocolate or candy melts. This is MUCH easier in a double boiler, but you can use the microwave for the candy melts if you need to.
7. Roll the cake balls (using the stick) in the candy, and allow any excess covering to drain.
8. Once you have rolled the cake balls, either allow them to set up in the refrigerator before decorating, OR go ahead and apply sprinkles or other decorations while they are cooling. This will depend on how you want to decorate them.
9. Once you have them decorated, you will need to consider a way to display them. For my shower pops, I plan on getting a pink mug, some block floral foam, and covering the foam in saran wrap! I will then neatly arrange the cake balls into the foam! You can get TONS of ideas from Bakerella! This tutorial is just to get you started!
This is a VERY BASIC tutorial on how to make a traditional, basic cake pop!
You can also purchase the Bakerella Cake Pop cook book below! I am also including a link on the Baby Cakes donut hole maker. This is REALLY cute, and REALLY fast (4 minutes!) to making the lighter, non-traditional cake pop. However, you would need REALLY thin chocolate to cover these. I would also think you would need to freeze them on the stick before dipping them, so that they do not crumble!


My last attempt at cake balls was a major fail. Thanks for the easy step-by-step tutorial. Hopefully my next attempt will turn out much better!
Oh Laura! They were DEFINITELY hard to make! If I had a double boiler, things would have gone much smoother! LOL